This section contains information about the Map Layer Action Menu, expand the subject titles below to expand the accordion.
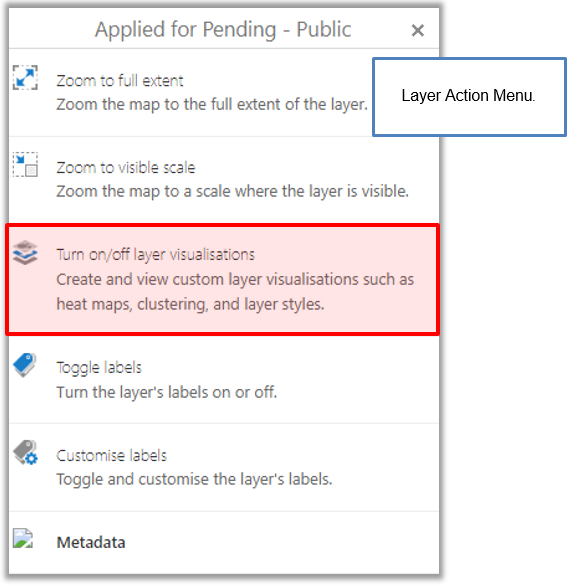
The Map Layer Action menu > allows users to:
- Change the scale of the map to cover the full extent of a layer.
- Zoom the map to a scale where the layer is visible
- Customise the layer styles by changing the colour, pattern and transparency or creating new visualisations such as clustering and heat maps.
- Turn the layer's labels on and off within the map display.
- Customise the layer's label by changing the font size and colour.
- Find metadata - information about the layer.
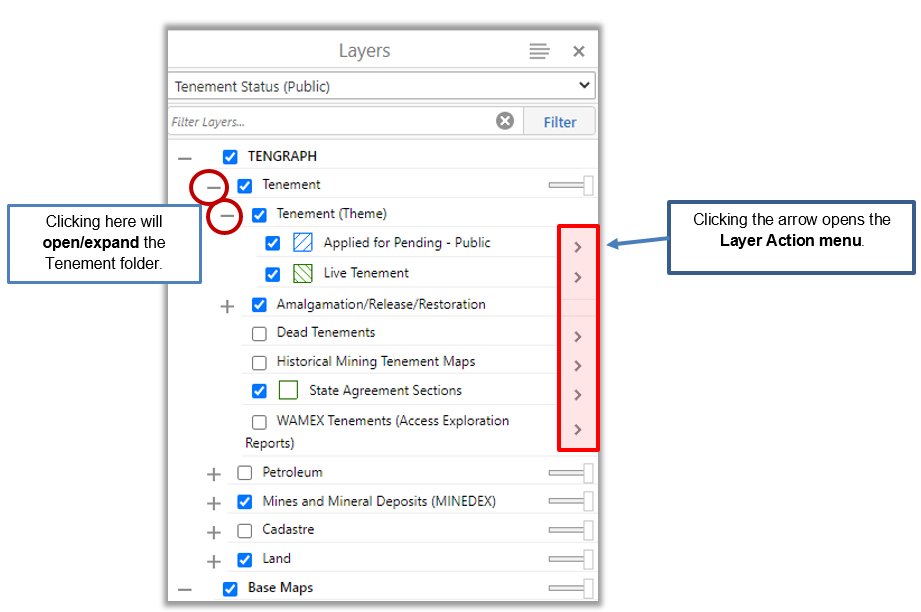
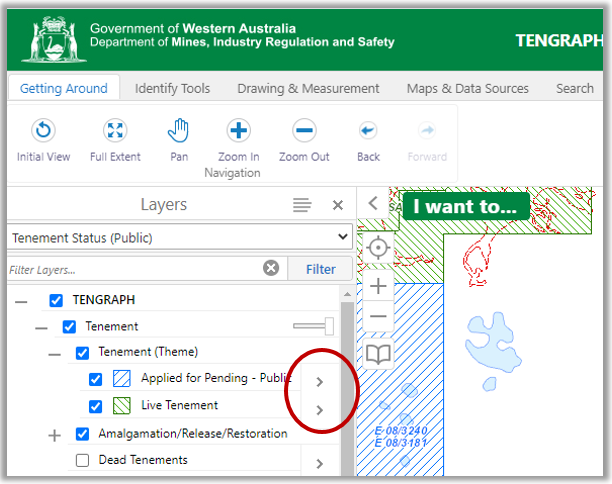
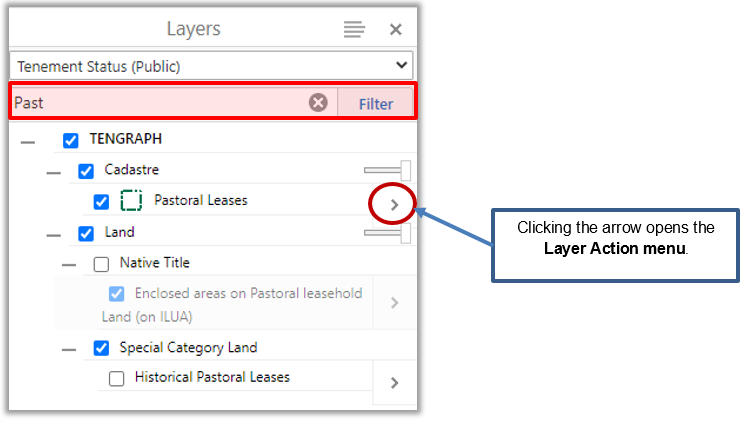
Open the Layer Action Menu by clicking on the ">" arrow next to the Layer name.
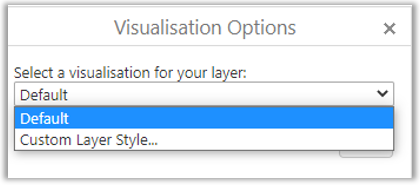
The visualisation options allow users to change the colour, pattern and transparency of any layer displayed in TENGRAPH.
In this example, we will change the pattern and transparency of the Applied for Pending tenement map layer.
1. Within the Map Layers panel, expand the Tenement folder and Tenement (Theme) layers until the Applied for Pending and Live tenements become visible.
2. Open the Layer Action menu > .
3. Click on the Turn on/off/layer visualisations option from the list.
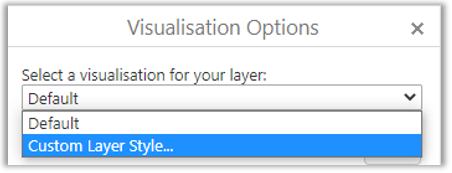
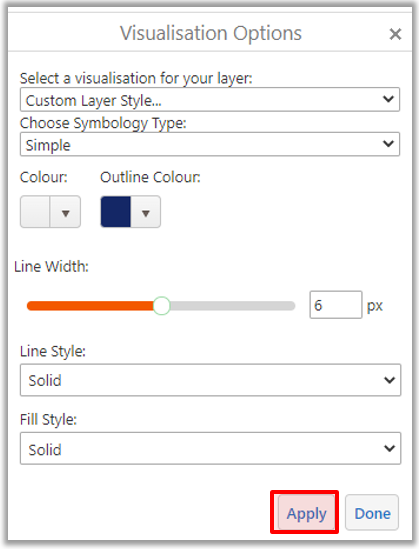
4. Select the Custom Layer Style option from the drop down menu.
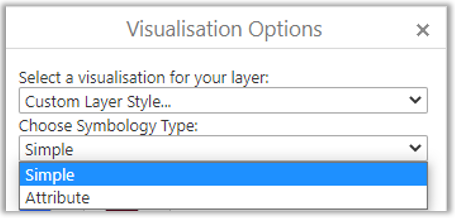
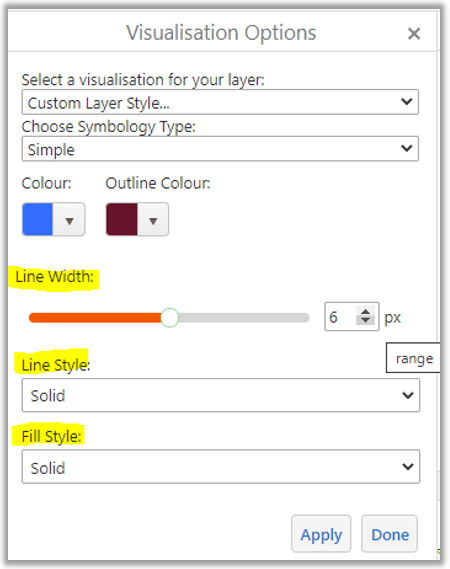
5. Select the Simple Symbology type.
6. Click on the Colour down arrow to change the pending tenement’s colour and transparency/opacity.

7. Drag the transparency/opacity setting from 100% to 0% for underlying map layers to be visible.
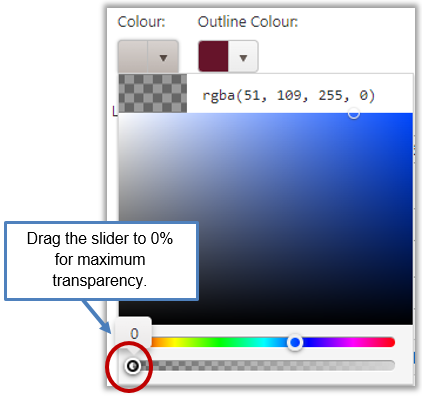
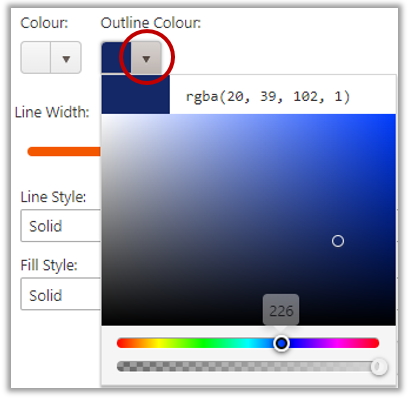
8. Select a suitable outline colour for pending tenement applications.
9. Apply your changes.
TENGRAPH default layer display:

New Customised Pending tenement layer display:
10. Selecting the Default visualization option will revert the pending tenement layer display back to its original colour and pattern.
Symbology type tips
- Use the Line Width slider (or click the numeric field and use the up/down arrows) to change the line width.
- Use the Line Style drop down menu to choose solid, dot or dashed lines.
- Use the Fill Style list to choose a solid or pattern fill style.
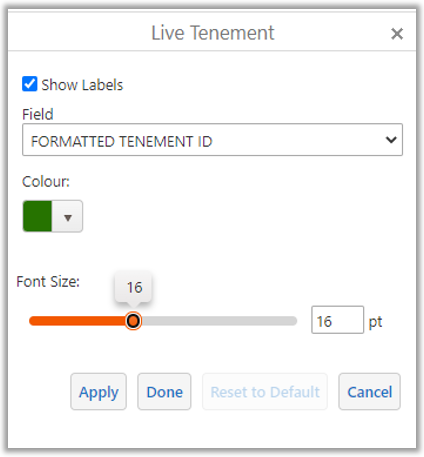
In TENGRAPH, you can customise the label display, size and colour by accessing the Layer Action menu.
Using the Layers panel, navigate to the layer you want to change and click on the > arrow.
A new Tab opens revelling what Label changes can be done on the map display.
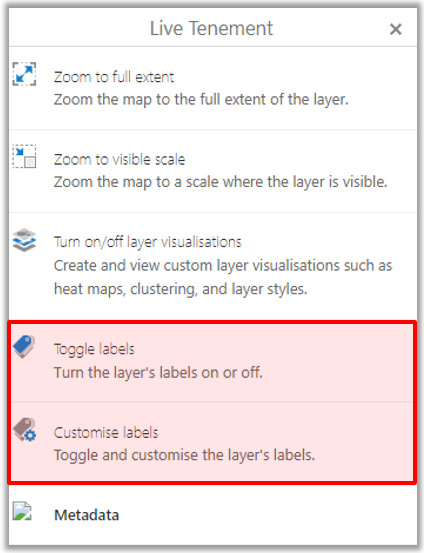
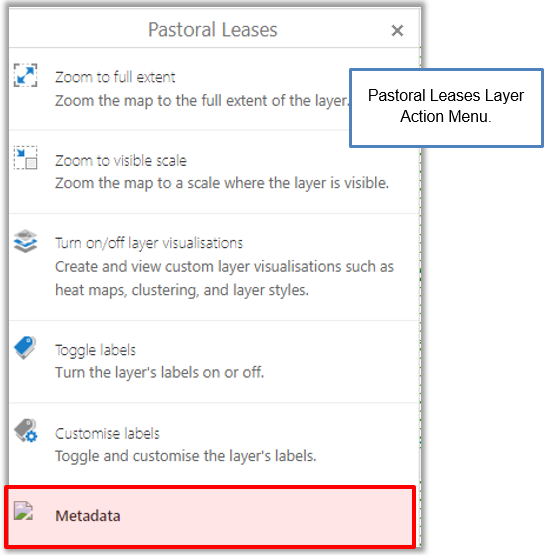
This is the Layer Actions menu for the Live Tenement layer.
Using this menu, you can turn live tenement labels on or off using the Toggle labels option.
You can also change the label colour and font size by opening the Customise labels window.
Clicking on the Customise labels button, opens a new window where you can choose a different attribute field to generate labels shown on the map display.
Toggling or customising labels affects the entire layer – not single features within the layer.
Clicking on the Reset to Default button will change the label display back to their original properties.
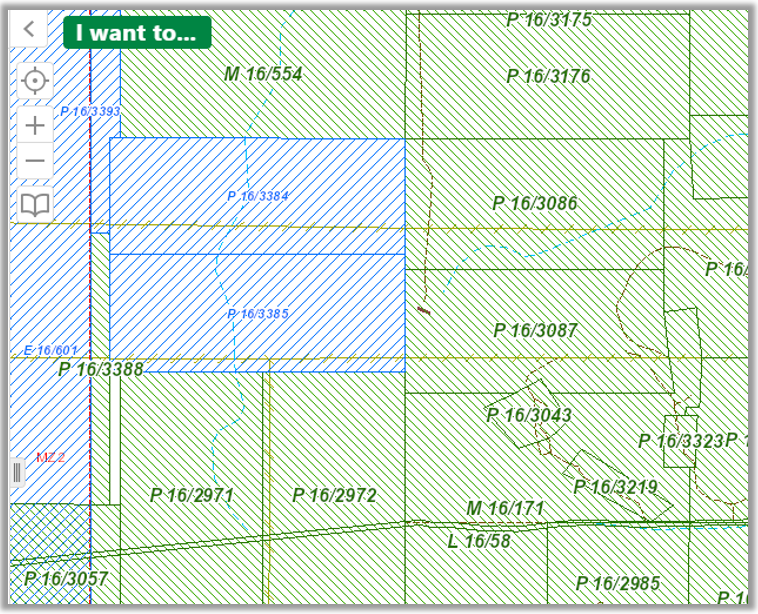
Map display with larger live tenement labels.
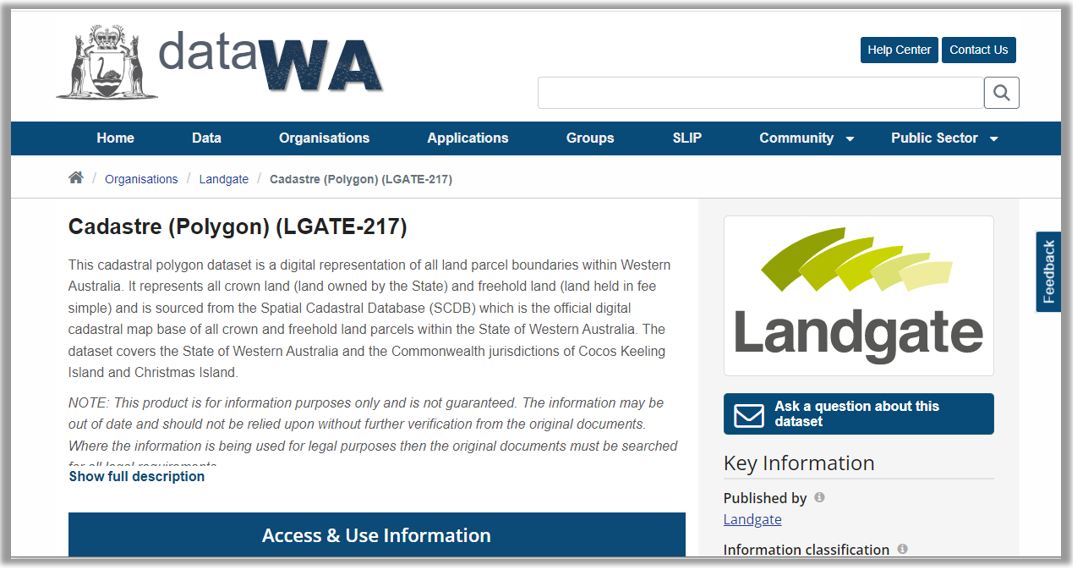
Metadata provides custodian, source, data and attribute information about a map layer shown in TENGRAPH.
To find information about a map layer select Metadata from the Layer Action Menu.
In this example find Pastoral Leases using the Layers Filter and open the Layer Action menu.
Click on the Metadata option form the list. A new browser tab opens displaying information about the data.
Example of Cadastre Metadata:
Many of the data layers displayed inn TENGRAPH are available for use in GIS systems.
Open the Providing Access to WA Government Data link for more information about this service.